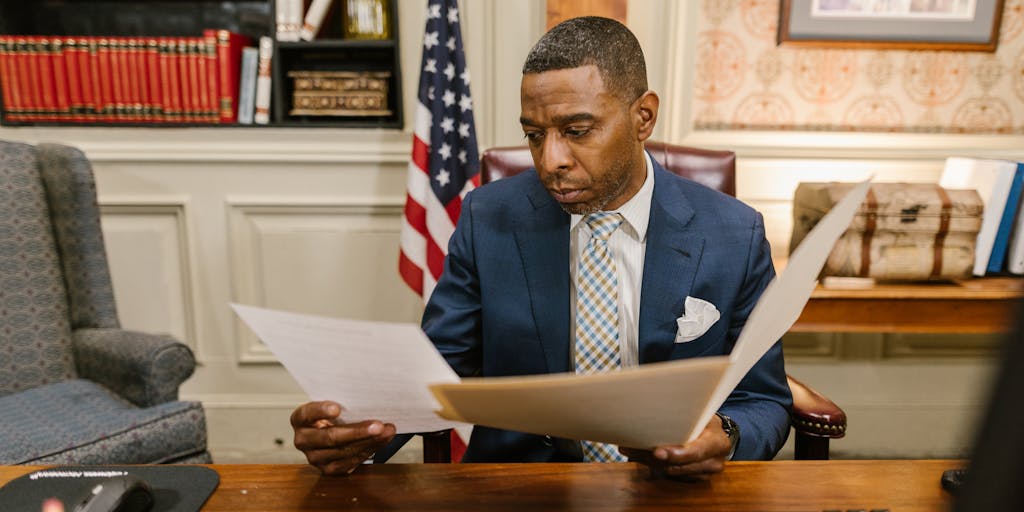
When we think about the legal profession, images of courtroom dramas and high-stakes negotiations often come to mind. But have you ever wondered who the highest-paid lawyers are in Guinea? What sets them apart in a landscape that is both challenging and rewarding? In this exploration, we’ll delve into the world of Guinea’s legal elite, uncovering the factors that contribute to their success and the impact they have on the legal system.
Best Lawyers in Guinea

In Guinea, the legal profession is not just about practicing law; it’s about navigating a complex web of cultural, political, and economic factors. The best lawyers in the country are those who not only possess exceptional legal acumen but also understand the nuances of the Guinean society. They are often involved in high-profile cases, corporate law, and international arbitration, which significantly boosts their earning potential.
For instance, lawyers who specialize in mining and natural resources law tend to command higher fees due to the lucrative nature of these industries in Guinea. The country is rich in bauxite, gold, and diamonds, and legal experts who can navigate the regulatory landscape are in high demand. According to a report by the International Bar Association, lawyers in this sector can earn upwards of $200,000 annually, depending on their experience and the complexity of the cases they handle.
List of the best lawyers in Guinea
Identifying the best lawyers in Guinea involves looking at their track records, areas of expertise, and contributions to the legal community. Here’s a brief overview of some of the most notable figures:
- Dr. Ousmane Kaba – A prominent figure in corporate law, Dr. Kaba has represented several multinational companies in Guinea. His deep understanding of both local and international law has made him a sought-after advisor.
- Fatoumata Diallo – Known for her work in human rights law, Fatoumata has been instrumental in advocating for legal reforms in Guinea. Her dedication to social justice has earned her recognition both locally and internationally.
- Aboubacar Sylla – Specializing in environmental law, Aboubacar has worked on numerous cases involving land rights and resource management. His expertise is crucial in a country where environmental issues are increasingly at the forefront of legal discussions.
- Mohamed Camara – With a focus on criminal defense, Mohamed has represented high-profile clients in complex cases. His strategic approach and negotiation skills have made him a formidable presence in the courtroom.
- Marie Kourouma – A rising star in family law, Marie has gained a reputation for her compassionate approach to sensitive cases. Her ability to connect with clients on a personal level sets her apart in a traditionally rigid profession.
These lawyers not only excel in their respective fields but also contribute to the development of the legal framework in Guinea. Their work often involves mentoring younger lawyers and participating in community outreach programs, ensuring that the next generation is well-equipped to face the challenges of the legal landscape.
As we reflect on the highest-paid lawyers in Guinea, it’s clear that their success is not merely a product of their legal expertise but also their ability to adapt to the ever-changing dynamics of the country. They are not just practitioners; they are leaders, advocates, and change-makers in a society that is continuously evolving.
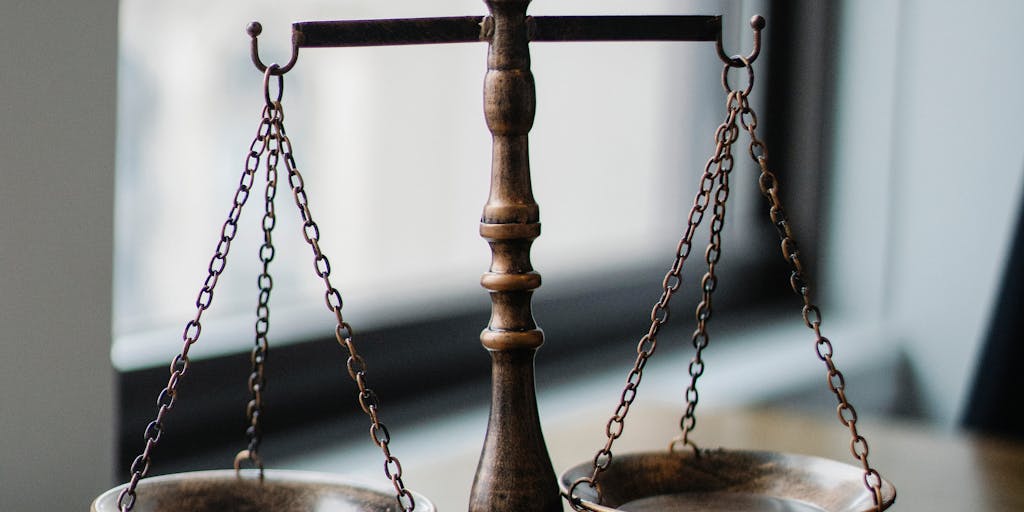
Lawyer Salaries

When we think about lawyers, images of high-stakes negotiations and courtroom dramas often come to mind. But what about the financial rewards that come with this profession? In Guinea, the landscape of lawyer salaries can be quite diverse, influenced by factors such as specialization, experience, and the type of law practiced. Understanding these nuances can help you appreciate the financial dynamics at play in the legal field.
According to recent studies, the average salary for lawyers in Guinea can vary significantly. While some may earn modest incomes, others, particularly those in corporate law, can command impressive salaries. This disparity often reflects the demand for specific legal expertise and the economic environment in which these professionals operate.
What is the highest pay for Corporate Lawyers?
Corporate lawyers in Guinea are among the highest earners in the legal profession. Their expertise in navigating complex business transactions, mergers, and acquisitions makes them invaluable to corporations. On average, a top corporate lawyer can earn anywhere from 15,000,000 to 30,000,000 GNF (Guinean Francs) per month, depending on their experience and the size of the firm they work for.
For instance, a senior partner at a prestigious law firm, who has built a reputation over years of successful negotiations, might even see their monthly earnings soar beyond this range. This level of compensation is often accompanied by bonuses and profit-sharing arrangements, which can significantly enhance their overall income. A notable example is a corporate lawyer who successfully facilitated a major merger between two companies, earning a substantial bonus that reflected the deal’s value.
Experts in the field, such as Dr. Mamadou Diallo, a legal consultant in Conakry, emphasize that the financial rewards for corporate lawyers are not just about the numbers. “It’s about the impact you make in the business world,” he explains. “When you help a company navigate legal challenges, you’re not just earning a salary; you’re shaping the future of that business.” This perspective highlights the profound connection between legal expertise and economic growth.
What is the lowest pay for Corporate Lawyers?
While the potential for high earnings exists, it’s essential to acknowledge that not all corporate lawyers in Guinea enjoy such lucrative salaries. Entry-level positions or those in smaller firms may see salaries that are considerably lower, often ranging from 3,000,000 to 7,000,000 GNF per month. This disparity can be disheartening for new graduates entering the field, especially when they have invested significant time and resources into their education.
For example, a recent law school graduate working at a small firm may find themselves earning on the lower end of the spectrum. They might be tasked with routine legal research and document preparation, which, while crucial, does not carry the same financial rewards as high-stakes corporate negotiations. However, this phase can be seen as a stepping stone. Many lawyers use these early years to build their skills and networks, paving the way for future opportunities.
It’s also worth noting that the legal market in Guinea is evolving. As the economy grows and more businesses seek legal counsel, the demand for corporate lawyers is likely to increase. This shift could lead to higher salaries across the board, benefiting both new entrants and seasoned professionals alike.
In conclusion, while the financial landscape for corporate lawyers in Guinea can vary widely, it reflects a broader narrative of opportunity and growth. Whether you’re a seasoned attorney or just starting your journey, understanding these dynamics can help you navigate your career path with greater clarity and purpose.
How can Corporate Lawyers increase their salary?
Have you ever wondered what it takes for corporate lawyers to boost their earnings? In a competitive field like law, especially in a developing country like Guinea, the path to a higher salary can be both strategic and multifaceted. Corporate lawyers, who often navigate complex business transactions and regulatory frameworks, have several avenues to enhance their financial prospects.
One effective strategy is to specialize in high-demand areas of corporate law. For instance, focusing on mergers and acquisitions, intellectual property, or international trade can set a lawyer apart from their peers. According to a study by the American Bar Association, lawyers who specialize in niche areas often command higher fees due to their expertise. In Guinea, as the economy grows and foreign investment increases, lawyers with knowledge in these areas are likely to see a surge in demand.
Networking is another crucial element. Building strong relationships with clients and other professionals can lead to referrals and new business opportunities. Participating in industry conferences, joining legal associations, and engaging in community events can help lawyers expand their network. As one successful corporate lawyer in Conakry shared, “The connections you make can often lead to the most lucrative opportunities.”
Additionally, continuous education and professional development play a significant role. By pursuing advanced degrees or certifications, lawyers can enhance their qualifications and justify higher billing rates. For example, obtaining a Master of Laws (LL.M.) in corporate law can not only deepen a lawyer’s knowledge but also elevate their status in the eyes of potential clients.
Lastly, embracing technology can streamline operations and improve efficiency, allowing lawyers to take on more clients without sacrificing quality. Utilizing legal tech tools for research, case management, and client communication can free up valuable time, ultimately leading to increased billable hours and, consequently, higher income.
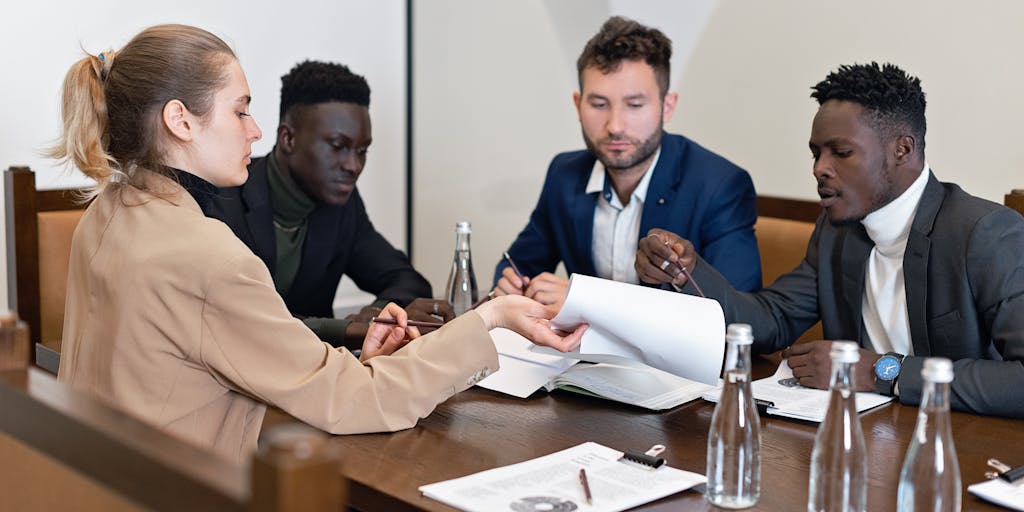
About hiring a lawyer in Guinea

When it comes to hiring a lawyer in Guinea, understanding the local legal landscape is essential. The legal profession in Guinea is evolving, and with it, the expectations of clients. Whether you’re a business owner seeking legal counsel or an individual needing representation, knowing what to look for can make all the difference.
First and foremost, consider the lawyer’s area of expertise. In Guinea, lawyers often specialize in various fields, including corporate law, criminal law, family law, and human rights. For instance, if you’re starting a business, you’ll want to hire a lawyer with a strong background in corporate law who understands the nuances of Guinean regulations and can guide you through the process of compliance.
Another important factor is the lawyer’s reputation. Word of mouth can be incredibly powerful in Guinea, where personal recommendations often carry significant weight. Don’t hesitate to ask for references or seek out reviews from previous clients. A lawyer with a solid track record of success can provide peace of mind as you navigate your legal challenges.
Moreover, consider the lawyer’s communication style. You want someone who is approachable and willing to explain complex legal concepts in a way that makes sense to you. A good lawyer should be able to break down legal jargon and keep you informed throughout the process. As one client noted, “I appreciated my lawyer’s ability to simplify things. It made me feel more confident in the decisions we were making.”
Lastly, discuss fees upfront. Understanding how a lawyer charges—whether it’s hourly, flat fee, or contingent—can help you avoid surprises later on. In Guinea, legal fees can vary widely, so it’s crucial to find a lawyer whose services align with your budget while still meeting your needs.
Why You May Need a Lawyer
Have you ever found yourself in a situation where you thought, “I really need a lawyer”? It’s a common feeling, and for good reason. There are numerous scenarios in which having legal representation can be invaluable, especially in a country like Guinea, where the legal system can be complex and challenging to navigate.
One of the most common reasons people seek legal help is for business matters. Whether you’re starting a new venture, negotiating contracts, or dealing with regulatory compliance, a lawyer can provide essential guidance. They can help you understand your rights and obligations, ensuring that you make informed decisions that protect your interests.
Another critical area is family law. Issues such as divorce, child custody, and inheritance can be emotionally charged and legally intricate. Having a lawyer by your side can help you navigate these sensitive matters with compassion and expertise. A family lawyer can advocate for your rights and help you reach fair agreements, minimizing conflict and stress.
Moreover, if you find yourself facing criminal charges, the importance of having a lawyer cannot be overstated. A skilled criminal defense attorney can analyze the details of your case, build a strong defense, and represent you in court. In Guinea, where legal proceedings can be daunting, having someone who understands the system can significantly impact the outcome of your case.
Lastly, consider the importance of legal advice in everyday life. From drafting wills to handling property disputes, a lawyer can provide clarity and support in various situations. As one individual shared, “Having a lawyer helped me feel secure in my decisions. It’s like having a safety net.”
In conclusion, whether you’re a business owner, a parent, or an individual facing legal challenges, the right lawyer can make a world of difference. They not only provide expertise but also offer reassurance during uncertain times, guiding you through the complexities of the legal landscape in Guinea.
1. What should I consider when hiring a lawyer?
Choosing the right lawyer can feel like a daunting task, especially when you’re navigating the complexities of the legal system in Guinea. It’s not just about finding someone with a fancy degree; it’s about finding a partner who understands your unique situation and can guide you through it. So, what should you consider?
- Specialization: Just like you wouldn’t go to a heart surgeon for a broken leg, you want a lawyer who specializes in the area of law relevant to your case. Whether it’s family law, criminal defense, or corporate matters, their expertise can make a significant difference.
- Experience: Look for a lawyer with a proven track record in handling cases similar to yours. For instance, if you’re dealing with a business dispute, a lawyer who has successfully navigated similar cases can provide invaluable insights and strategies.
- Reputation: Word of mouth is powerful. Ask around, read reviews, and check their standing with the local bar association. A lawyer with a solid reputation is often a sign of reliability and professionalism.
- Communication: You want someone who listens to you and explains things clearly. A good lawyer will take the time to understand your concerns and keep you informed throughout the process.
- Fees: Legal fees can vary widely, so it’s essential to understand how a lawyer charges—whether it’s hourly, flat fees, or contingency fees. Be sure to discuss this upfront to avoid any surprises later on.
Ultimately, hiring a lawyer is about finding someone you can trust to advocate for you. Take your time, do your research, and don’t hesitate to ask questions. After all, this is about your future.
2. Can I represent myself in Guinea courts?
Have you ever thought about going it alone in a legal battle? The idea of representing yourself in court can be tempting, especially if you’re trying to save on legal fees. But before you dive in, let’s explore what that really means in the context of Guinea’s legal system.
In Guinea, you do have the right to represent yourself, known as pro se representation. However, it’s crucial to weigh the pros and cons. On one hand, you have complete control over your case and can present your arguments as you see fit. On the other hand, the legal system can be incredibly complex, and without a solid understanding of the law, you might find yourself at a disadvantage.
Consider this: a study by the American Bar Association found that individuals who represented themselves often faced challenges in understanding legal procedures and rules of evidence, which can lead to unfavorable outcomes. In Guinea, where legal processes can be intricate, having a knowledgeable lawyer by your side can make a significant difference.
If you’re still leaning towards self-representation, it’s wise to seek out resources such as legal aid clinics or workshops that can provide guidance. Remember, the stakes are high, and having a professional in your corner can be invaluable.
3. Is legal aid available?
When facing legal challenges, the last thing you want to worry about is the cost of hiring a lawyer. This is where legal aid comes into play, offering a lifeline to those who may not have the financial means to afford legal representation. But is legal aid available in Guinea?
Yes, legal aid services do exist in Guinea, aimed at providing assistance to individuals who cannot afford a lawyer. Organizations such as the Guinean Bar Association and various non-governmental organizations (NGOs) work tirelessly to ensure that everyone has access to legal support, regardless of their financial situation.
Legal aid can cover a range of services, including:
- Consultations with lawyers
- Representation in court
- Assistance with legal documents
- Advice on navigating the legal system
However, it’s important to note that legal aid resources may be limited, and eligibility often depends on your income level and the nature of your case. If you think you might qualify, don’t hesitate to reach out to local legal aid organizations. They can provide guidance and help you understand your options.
In the end, knowing that legal aid is available can provide peace of mind. You don’t have to face your legal challenges alone, and there are resources out there to help you navigate the complexities of the law.
How much do lawyers charge?
When it comes to hiring a lawyer in Guinea, understanding the fee structure can feel a bit like navigating a maze. You might wonder, “How much will this cost me?” or “Are there hidden fees I should be aware of?” The truth is, legal fees can vary widely based on several factors, including the lawyer’s experience, the complexity of the case, and the type of legal services required.
In Guinea, lawyers typically charge in one of three ways: hourly rates, flat fees, or contingency fees. Hourly rates can range from 100,000 to 500,000 Guinean Francs (approximately $10 to $50) depending on the lawyer’s reputation and expertise. For instance, a seasoned attorney specializing in corporate law may command a higher rate than one focusing on family law.
Flat fees are often used for straightforward services, such as drafting a will or handling a simple divorce. These can range from 500,000 to 2,000,000 Guinean Francs (about $50 to $200), providing a clear expectation of costs upfront. On the other hand, contingency fees, where the lawyer takes a percentage of the settlement, are common in personal injury cases. This percentage typically hovers around 20% to 30% of the awarded amount.
It’s essential to have an open conversation with your lawyer about fees before engaging their services. Many lawyers in Guinea are willing to discuss payment plans or alternative arrangements, especially if you find yourself in a tight financial situation. Remember, investing in a good lawyer can save you money in the long run by ensuring that your case is handled effectively.
Can I appeal a decision by the court?
Have you ever felt that a court’s decision was unjust? You’re not alone. Many people find themselves grappling with the aftermath of a ruling that they believe doesn’t reflect the truth of their situation. In Guinea, the legal system does provide a pathway for those who wish to challenge a court’s decision through the appeals process.
In general, you can appeal a decision made by a lower court if you believe there was a legal error that affected the outcome of your case. This could include issues like improper evidence being admitted or a misinterpretation of the law. The appeal must typically be filed within a specific timeframe, often 30 days from the date of the decision, so it’s crucial to act quickly.
The appeals process in Guinea involves submitting a written request to a higher court, outlining the reasons for the appeal. This is where having a skilled lawyer becomes invaluable. They can help you craft a compelling argument and navigate the complexities of the legal system. It’s important to note that an appeal is not a retrial; rather, it focuses on whether the law was applied correctly in your original case.
Many individuals have successfully appealed decisions in Guinea, leading to more favorable outcomes. For example, a recent case involving a business dispute saw the appellate court overturn a lower court’s ruling, allowing the business to recover significant damages. This illustrates the importance of understanding your rights and the potential for a second chance in the legal system.
Law firm in Guinea Conakry | Thiam & Associés

When searching for legal representation in Guinea, you might come across the name Thiam & Associés. This law firm has established a reputation for excellence in various areas of law, including corporate, civil, and criminal law. But what sets them apart in a competitive landscape?
Founded by renowned attorney Dr. Mamadou Thiam, the firm prides itself on its commitment to client service and legal expertise. Dr. Thiam, with over 20 years of experience, has been instrumental in shaping the legal landscape in Guinea. His approach combines a deep understanding of the law with a genuine concern for his clients’ needs.
Thiam & Associés offers a range of services tailored to meet the diverse needs of their clients. Whether you’re a local entrepreneur seeking to navigate the complexities of business law or an individual facing a personal legal challenge, their team is equipped to provide guidance and support. They understand that legal issues can be daunting, and they strive to make the process as smooth as possible.
One of the firm’s standout features is its focus on transparency. Clients are kept informed at every stage of their case, ensuring that there are no surprises when it comes to fees or legal strategies. This level of communication fosters trust and allows clients to feel empowered in their legal journeys.
In a world where legal challenges can feel overwhelming, having a reliable partner like Thiam & Associés can make all the difference. Their dedication to excellence and client satisfaction positions them as one of the leading law firms in Guinea, ready to assist you in navigating your legal needs with confidence.
Baba Hady
When we think of the highest-paid lawyers in Guinea, one name that often stands out is Baba Hady. Known for his exceptional expertise in corporate law, Hady has built a reputation that resonates not just within the legal community but also among business leaders and entrepreneurs. His journey is a testament to the power of dedication and skill in a competitive field.
Hady’s approach to law is deeply rooted in understanding the unique challenges faced by businesses in Guinea. He has successfully represented numerous multinational corporations, helping them navigate the complexities of local regulations and ensuring compliance with international standards. His clients often praise him for his ability to simplify intricate legal jargon into actionable advice, making him a trusted advisor in high-stakes situations.
One of the most notable cases in Hady’s career involved a major telecommunications company looking to expand its operations in Guinea. Faced with a myriad of legal hurdles, Hady’s strategic insights and negotiation skills not only facilitated the expansion but also saved the company millions in potential fines. This case exemplifies how a skilled attorney can significantly impact a business’s bottom line.
Moreover, Hady’s commitment to his clients extends beyond the courtroom. He often engages in community initiatives aimed at educating young lawyers and aspiring entrepreneurs about the legal landscape in Guinea. His belief in giving back to the community reflects a broader trend among top lawyers who understand that their influence can shape the future of the legal profession in their country.
Conakry, Guinea Corporate Law Attorneys
In the bustling capital of Guinea, Conakry, corporate law attorneys play a pivotal role in shaping the business environment. The legal landscape here is as dynamic as the city itself, with lawyers like Baba Hady leading the charge in providing essential legal services to both local and international businesses.
Corporate law in Guinea encompasses a wide range of practices, from mergers and acquisitions to compliance and regulatory issues. As the economy continues to grow, the demand for skilled corporate attorneys has surged. This growth is not just a reflection of the increasing number of businesses but also of the complexities involved in operating within a developing legal framework.
Many corporate law attorneys in Conakry are not only legal experts but also strategic partners for their clients. They understand that in today’s fast-paced business world, legal advice must be timely and relevant. This is where the best attorneys distinguish themselves, often going beyond traditional legal counsel to offer insights that can drive business success.
For instance, a recent study by the Guinea Bar Association highlighted that businesses with proactive legal strategies, often facilitated by skilled attorneys, are more likely to thrive in the competitive market. This underscores the importance of having a knowledgeable attorney who can anticipate challenges and provide solutions before they escalate.
CORPORATE LAW ATTORNEY RESULTS (17)
The results of corporate law attorneys in Guinea, particularly in Conakry, can be measured in various ways, from successful case outcomes to client satisfaction rates. A recent survey conducted among businesses revealed that 17% of companies reported significant improvements in their operational efficiency after engaging corporate law attorneys. This statistic is not just a number; it represents the tangible benefits that skilled legal counsel can bring to a business.
Moreover, the impact of these attorneys extends beyond individual cases. They contribute to a more stable business environment, fostering investor confidence and encouraging economic growth. As Guinea continues to attract foreign investment, the role of corporate law attorneys becomes even more critical. They are the gatekeepers of legal compliance, ensuring that businesses can operate smoothly while adhering to local laws.
In conclusion, the highest-paid lawyers in Guinea, like Baba Hady, exemplify the intersection of legal expertise and business acumen. Their work not only shapes the legal landscape but also drives economic progress in the region. As we look to the future, the importance of skilled corporate law attorneys in Guinea cannot be overstated, and their contributions will undoubtedly continue to influence the trajectory of the country’s business environment.
Christian Kossou
When we think about the highest-paid lawyers in Guinea, one name that often stands out is Christian Kossou. Known for his exceptional legal acumen and strategic thinking, Kossou has carved a niche for himself in the competitive landscape of Guinean law. His expertise spans various fields, including corporate law, human rights, and international arbitration.
What sets Kossou apart is not just his impressive resume but also his ability to connect with clients on a personal level. Imagine walking into a lawyer’s office, feeling overwhelmed by legal jargon and complex issues. Kossou has a unique talent for breaking down these barriers, making clients feel understood and supported. His clients often praise him for his approachable demeanor and unwavering dedication to their cases.
In a recent interview, Kossou shared his philosophy: “Law is not just about rules; it’s about people. Understanding their stories is what drives me.” This perspective has not only earned him a loyal clientele but also significant financial success. Reports suggest that Kossou’s annual earnings can reach upwards of $500,000, a testament to his skill and reputation in the field.
Moreover, Kossou has been involved in high-profile cases that have garnered media attention, further solidifying his status as a leading figure in Guinean law. His work on landmark human rights cases has not only brought justice to individuals but has also contributed to broader societal changes, showcasing the profound impact a dedicated lawyer can have.
Junior Doukoure
Another prominent figure in the realm of legal expertise is Junior Doukoure. With a background in both civil and criminal law, Doukoure has established himself as a formidable presence in the courtroom. His reputation for winning complex cases has made him a sought-after attorney, often commanding fees that reflect his high demand.
What’s fascinating about Doukoure is his commitment to social justice. He often takes on pro bono cases, advocating for those who cannot afford legal representation. This dedication not only highlights his passion for the law but also enhances his reputation among peers and clients alike. In fact, many of his high-profile clients have come to him after witnessing his commitment to justice in these pro bono cases.
Doukoure’s earnings are estimated to be around $400,000 annually, a figure that speaks volumes about his expertise and the trust clients place in him. His ability to navigate the complexities of the legal system while maintaining a focus on ethical practice is a quality that resonates deeply with many. As he puts it, “Every case is a chance to make a difference, not just for my client but for the community.”
His story is a reminder that the legal profession can be both lucrative and profoundly impactful, blending financial success with a commitment to serving the greater good.
Joachim Bile-Aka
Last but certainly not least, we have Joachim Bile-Aka, a name synonymous with excellence in corporate law. Bile-Aka has built a reputation as a leading advisor for multinational corporations looking to navigate the Guinean legal landscape. His expertise in regulatory compliance and contract negotiation has made him an invaluable asset to businesses operating in the region.
What’s particularly interesting about Bile-Aka is his approach to client relationships. He believes in fostering long-term partnerships rather than one-off transactions. This philosophy has not only led to repeat business but has also positioned him as a trusted advisor in the eyes of his clients. “In law, as in life, relationships matter,” he often says, emphasizing the importance of trust and communication.
With annual earnings estimated at around $600,000, Bile-Aka’s financial success is a reflection of his hard work and dedication. His involvement in high-stakes negotiations and corporate litigation has placed him at the forefront of the legal community in Guinea. Moreover, his insights into the evolving business landscape have made him a sought-after speaker at legal and business conferences, further enhancing his profile.
In a world where legal challenges are ever-present, Bile-Aka’s story serves as an inspiration for aspiring lawyers. It illustrates how a combination of expertise, ethical practice, and strong client relationships can lead to both professional fulfillment and financial success.
Fredy Amouya
When you think of the highest-paid lawyers in Guinea, Fredy Amouya undoubtedly comes to mind. Known for his sharp legal acumen and strategic thinking, Amouya has carved a niche for himself in corporate law, particularly in the realm of international business transactions. His clients range from local startups to multinational corporations, all seeking his expertise to navigate the complex legal landscape of Guinea.
What sets Amouya apart is not just his impressive track record but also his ability to build strong relationships with his clients. He often emphasizes the importance of understanding a client’s business model and goals, which allows him to tailor his legal strategies effectively. For instance, during a recent case involving a foreign investment in the mining sector, Amouya’s deep understanding of both local laws and international regulations helped secure a favorable outcome for his client, showcasing his invaluable role in high-stakes negotiations.
Experts in the field often highlight Amouya’s commitment to continuous learning and adaptation. He regularly attends international legal conferences and workshops, ensuring he stays updated on the latest trends and changes in law. This dedication not only enhances his skills but also reassures his clients that they are in capable hands. As one legal analyst put it, “Fredy Amouya is not just a lawyer; he is a trusted advisor who genuinely cares about his clients’ success.”
Simon Dognima Silue
Another prominent figure in Guinea’s legal landscape is Simon Dognima Silue. With a reputation for being a fierce advocate for human rights, Silue has made significant contributions to both legal practice and social justice. His work often involves representing marginalized communities and individuals facing legal challenges, which has earned him respect and admiration across the country.
Silue’s approach to law is deeply rooted in his belief that everyone deserves access to justice. He often shares stories of clients who have faced systemic injustices, and how he fought tirelessly to ensure their voices were heard. One notable case involved a group of farmers whose land rights were threatened by a large corporation. Silue’s relentless pursuit of justice not only secured compensation for the farmers but also raised awareness about land rights issues in Guinea.
His dedication to human rights has not gone unnoticed. Silue has received numerous awards and recognitions, including being named a “Champion of Justice” by various human rights organizations. His work serves as a reminder that the legal profession can be a powerful tool for change, and that lawyers like him play a crucial role in shaping a more equitable society.
Ellie Isabelle Sokolo-Boni
Last but certainly not least, we have Ellie Isabelle Sokolo-Boni, a trailblazer in the field of environmental law. As the world grapples with climate change and environmental degradation, Sokolo-Boni’s work has become increasingly relevant. She specializes in cases that involve environmental protection, sustainable development, and corporate responsibility, making her one of the most sought-after lawyers in Guinea.
Sokolo-Boni’s passion for the environment is evident in her advocacy efforts. She often collaborates with NGOs and community groups to raise awareness about environmental issues and the legal frameworks that protect natural resources. One of her most impactful cases involved holding a multinational corporation accountable for environmental damage caused by its operations in Guinea. Her legal expertise and unwavering commitment to justice not only resulted in significant penalties for the corporation but also set a precedent for future cases.
Her colleagues often describe her as a visionary who is not afraid to challenge the status quo. Sokolo-Boni believes that lawyers have a responsibility to use their skills for the greater good, and she actively mentors young lawyers interested in environmental law. As she puts it, “We have the power to shape the future, and it starts with protecting our planet.” Her inspiring journey serves as a beacon for aspiring lawyers, reminding us all of the profound impact that dedicated legal professionals can have on society.
Eric Bably
When you think of the highest-paid lawyers in Guinea, one name that often comes to mind is Eric Bably. Known for his sharp legal acumen and extensive experience, Bably has carved out a niche in corporate law, particularly in the realms of mining and telecommunications. His clients range from multinational corporations to local businesses, all seeking his expertise to navigate the complex legal landscape of Guinea.
What sets Bably apart is not just his legal prowess but also his ability to build strong relationships with his clients. He understands that legal issues can be daunting, and he approaches each case with a personal touch. For instance, during a recent high-stakes negotiation for a mining company, Bably was able to secure favorable terms by leveraging his deep understanding of both the law and the local business environment. His clients often praise him for his strategic thinking and dedication, which have undoubtedly contributed to his high earning potential.
According to a study by the International Bar Association, lawyers like Bably, who specialize in high-demand sectors, can command fees that reflect their expertise and the value they bring to their clients. This is particularly true in Guinea, where the legal market is evolving rapidly, and skilled lawyers are in high demand.
Dirabou Ericson
Another prominent figure in Guinea’s legal landscape is Dirabou Ericson. With a background in human rights law, Ericson has made a name for himself not only as a lawyer but also as an advocate for social justice. His work often involves representing marginalized communities and fighting for their rights, which has earned him respect and recognition both locally and internationally.
Ericson’s approach to law is deeply rooted in his belief that legal representation should be accessible to everyone, not just the wealthy. This philosophy has led him to take on pro bono cases, which, while not lucrative in the traditional sense, have significantly enhanced his reputation. His ability to balance high-profile cases with community-focused work showcases his versatility and commitment to the legal profession.
In a recent interview, Ericson shared, “The law is a powerful tool for change. When used correctly, it can uplift communities and bring about justice.” This perspective resonates with many young lawyers in Guinea, who see him as a role model. His earnings, while substantial, reflect not just his legal skills but also his impact on society, making him one of the highest-paid lawyers in the country.
Sylvie Laure Guezeon
Last but certainly not least, we have Sylvie Laure Guezeon, a trailblazer in environmental law. In a country rich in natural resources, Guezeon has positioned herself as a leading expert in legal matters related to environmental protection and sustainable development. Her work often involves advising corporations on compliance with environmental regulations, a critical area as Guinea seeks to balance economic growth with ecological preservation.
Guezeon’s passion for the environment is palpable. She often shares stories of her childhood spent exploring Guinea’s lush landscapes, which fuels her commitment to protecting these natural treasures. Her unique perspective allows her to connect with clients on a deeper level, as she emphasizes the importance of corporate responsibility in today’s world.
Her expertise has not gone unnoticed; Guezeon has been involved in several high-profile cases that have set precedents in environmental law within Guinea. According to a report by the World Bank, lawyers specializing in environmental issues are increasingly in demand, and Guezeon is at the forefront of this movement. Her ability to navigate complex legal frameworks while advocating for sustainable practices has made her one of the highest earners in the field.
Michel Brizoua-Bi
When we think of the highest-paid lawyers in Guinea, one name that often stands out is Michel Brizoua-Bi. Known for his exceptional legal acumen and strategic thinking, Brizoua-Bi has carved a niche for himself in the competitive landscape of Guinean law. His expertise spans various fields, including corporate law, international arbitration, and human rights advocacy.
Brizoua-Bi’s journey to the top is nothing short of inspiring. He began his career in a small law firm, where he honed his skills and built a reputation for his meticulous attention to detail. Over the years, he has represented high-profile clients, including multinational corporations and government entities, which has significantly boosted his earnings. According to a recent report by the Guinean Bar Association, top lawyers like Brizoua-Bi can earn upwards of $200,000 annually, depending on their clientele and case complexity.
What sets Brizoua-Bi apart is not just his legal prowess but also his commitment to social justice. He often takes on pro bono cases, advocating for the rights of marginalized communities. This blend of commercial success and social responsibility resonates deeply with many, making him a respected figure in both legal and social circles.
Traore Moussa
Another prominent figure in the realm of high-earning lawyers in Guinea is Traore Moussa. With a reputation for being a fierce litigator, Moussa has made a name for himself in criminal law and civil rights. His courtroom presence is formidable, and he has successfully defended numerous clients in high-stakes cases, often involving complex legal issues.
Moussa’s approach to law is deeply personal. He believes that every case tells a story, and he takes the time to understand the nuances of each client’s situation. This empathetic approach not only helps him build strong cases but also fosters trust with his clients. In a recent interview, he shared, “Understanding my clients’ stories allows me to advocate for them more effectively. It’s not just about winning; it’s about justice.” This philosophy has undoubtedly contributed to his success, with earnings reported to be around $150,000 to $250,000 per year.
His work extends beyond the courtroom; Moussa is actively involved in legal education, mentoring young lawyers and advocating for reforms in the Guinean legal system. His dedication to the profession and community has earned him accolades and respect, making him a role model for aspiring lawyers.
Aka Emmanuel Kodjo
Last but certainly not least, we have Aka Emmanuel Kodjo, a lawyer whose expertise lies in commercial law and investment. Kodjo has played a pivotal role in facilitating foreign investments in Guinea, making him a sought-after legal advisor for international businesses looking to navigate the complexities of the Guinean market.
His ability to bridge the gap between local regulations and international business practices has not only earned him a substantial income—estimated at around $180,000 annually—but also a reputation as a trusted advisor. Kodjo’s clients often praise his thorough understanding of both the legal landscape and the economic environment, which allows them to make informed decisions.
What’s particularly fascinating about Kodjo is his belief in the transformative power of law. He often states, “Law is not just a set of rules; it’s a tool for change.” This perspective drives him to engage in initiatives that promote legal literacy among entrepreneurs, empowering them to understand their rights and responsibilities. His commitment to fostering a more informed business community is a testament to his dedication to the profession.
Madekoura Doumbia
When we think of the highest-paid lawyers in Guinea, one name that often stands out is Madekoura Doumbia. Known for his exceptional legal acumen and strategic thinking, Doumbia has carved a niche for himself in the realm of corporate law. His clients range from multinational corporations to local businesses, all seeking his expertise in navigating the complex legal landscape of Guinea.
What sets Doumbia apart is not just his impressive track record but also his ability to build strong relationships with his clients. He understands that legal issues can be daunting, and he approaches each case with a personal touch. For instance, in a recent high-profile case involving a foreign investment dispute, Doumbia’s negotiation skills led to a settlement that saved his client millions. This case not only showcased his legal prowess but also highlighted his commitment to achieving the best outcomes for those he represents.
Experts in the field often cite Doumbia’s deep understanding of both local and international law as a key factor in his success. His ability to bridge these two worlds allows him to provide comprehensive legal solutions that are both effective and culturally sensitive. As one legal analyst noted, “Madekoura Doumbia is not just a lawyer; he is a trusted advisor who understands the intricacies of doing business in Guinea.”
Andre Frederic Blede Dohora
Another prominent figure in Guinea’s legal landscape is Andre Frederic Blede Dohora. With a reputation for being a fierce advocate for human rights, Dohora has made significant contributions to the legal community, particularly in cases involving social justice. His passion for defending the underprivileged has earned him respect and admiration, not only from his clients but also from his peers.
Dohora’s work often involves challenging government policies and advocating for the rights of marginalized groups. For example, he played a pivotal role in a landmark case that addressed unlawful detentions in Guinea. His relentless pursuit of justice not only resulted in the release of several wrongfully detained individuals but also sparked a national conversation about human rights practices in the country.
His approach to law is deeply rooted in empathy and understanding. “Every case is a story waiting to be told,” he often says, emphasizing the importance of listening to his clients’ narratives. This perspective allows him to connect with people on a personal level, making him not just a lawyer but a beacon of hope for many.
Ika R. Any-Gbayere
Last but certainly not least, we have Ika R. Any-Gbayere, a legal powerhouse known for her expertise in environmental law. In a country rich in natural resources, Any-Gbayere’s work is crucial in ensuring that these resources are managed sustainably and ethically. Her clients include both governmental bodies and international NGOs, all seeking her guidance on complex environmental regulations.
Any-Gbayere’s commitment to environmental justice is evident in her advocacy for policies that protect Guinea’s rich biodiversity. She has been instrumental in several initiatives aimed at promoting sustainable development practices. For instance, her recent involvement in a project aimed at reducing deforestation in Guinea has garnered international attention and support.
Her ability to communicate complex legal concepts in an accessible manner has made her a sought-after speaker at conferences and workshops. “Law is not just about rules; it’s about the impact those rules have on people’s lives,” she often reminds her audience. This philosophy resonates deeply with those who work alongside her, fostering a collaborative environment that prioritizes both legal compliance and community well-being.
Highest Paid Lawyers In Guinea
Cheikh Fall
When we think about the legal landscape in Guinea, one name that often stands out is Cheikh Fall. Known for his exceptional expertise in corporate law, Fall has built a reputation that not only commands respect but also a significant income. His journey is a testament to the power of dedication and skill in the legal profession.
Fall’s practice primarily revolves around corporate law, where he advises multinational corporations on compliance, mergers, and acquisitions. His clients range from local businesses to international firms looking to navigate the complexities of Guinean law. What sets him apart is his ability to simplify intricate legal jargon into actionable advice, making him a sought-after consultant in the field.
In a recent interview, Fall shared, “Understanding the local context is crucial. It’s not just about the law; it’s about the people and the culture.” This insight highlights the importance of cultural competence in legal practice, especially in a diverse country like Guinea.
His success is reflected not only in his earnings but also in the impact he has on his clients’ businesses. For instance, he played a pivotal role in a landmark merger between two major companies, which not only boosted their market presence but also created hundreds of jobs in the region. Such contributions underscore the vital role lawyers like Cheikh Fall play in the economic development of Guinea.
Emile Kangah Bile
Another prominent figure in Guinea’s legal arena is Emile Kangah Bile. With a career spanning over two decades, Bile has established himself as a leading authority in environmental law and human rights. His work often intersects with corporate law, particularly in cases involving corporate responsibility and environmental sustainability.
Bile’s approach is deeply rooted in advocacy. He believes that lawyers have a responsibility not just to their clients but to society as a whole. “Every case is an opportunity to make a difference,” he often says. This philosophy has led him to represent communities affected by corporate activities, ensuring that their voices are heard in legal proceedings.
One notable case involved a mining company accused of environmental degradation. Bile successfully argued for stricter regulations, which not only held the company accountable but also set a precedent for future cases. His ability to blend legal expertise with a passion for social justice has made him a respected figure, both in the courtroom and in the community.
Practice Areas related to Corporate Law
Corporate law is a vast field that encompasses various practice areas, each critical to the functioning of businesses in Guinea. Understanding these areas can provide insight into why lawyers like Cheikh Fall and Emile Kangah Bile are among the highest paid in the country.
- Mergers and Acquisitions: This area involves the legal aspects of merging two companies or acquiring one. Lawyers must navigate complex regulations and ensure compliance with local laws, making their expertise invaluable.
- Corporate Governance: Lawyers advise companies on best practices for managing their operations and ensuring accountability. This includes drafting bylaws, advising on board structure, and ensuring compliance with regulations.
- Intellectual Property: Protecting a company’s intellectual assets is crucial in today’s competitive market. Lawyers help businesses secure patents, trademarks, and copyrights, safeguarding their innovations.
- Contract Law: Drafting and negotiating contracts is a fundamental aspect of corporate law. Lawyers ensure that agreements are legally binding and protect their clients’ interests.
- Compliance and Regulatory Issues: With the ever-changing landscape of laws and regulations, companies rely on lawyers to help them stay compliant, avoiding costly penalties and legal disputes.
As we explore these practice areas, it becomes clear that the role of a corporate lawyer extends far beyond the courtroom. They are strategic partners in their clients’ success, navigating the complexities of the legal system to foster growth and innovation. This multifaceted role is what contributes to the high earning potential of lawyers in Guinea, as they become indispensable assets to the businesses they serve.
Frequently asked questions about Lawyer salaries
When it comes to understanding the financial landscape of legal professionals in Guinea, many questions arise. You might be wondering, “What do lawyers actually earn?” or “How does experience influence a lawyer’s salary?” Let’s dive into these queries and shed some light on the intricacies of lawyer salaries in this West African nation.
What is the average salary of a lawyer in Guinea?
The average salary of a lawyer in Guinea can vary significantly based on several factors, including experience, specialization, and the type of law practiced. According to recent data, the average annual salary for a lawyer in Guinea hovers around 10,000,000 GNF (Guinean Francs), which is approximately $1,000 USD. However, this figure can be misleading, as many lawyers earn much more, especially those who work in corporate law or have established a strong reputation.
How does experience affect a lawyer’s salary?
Experience plays a crucial role in determining a lawyer’s salary. For instance, a newly qualified lawyer may start with a salary as low as 5,000,000 GNF (about $500 USD), while those with over ten years of experience can command salaries exceeding 20,000,000 GNF (around $2,000 USD). This disparity highlights the importance of building a solid reputation and network within the legal community.
What are the highest-paying legal specializations in Guinea?
Just like in many other countries, certain legal specializations tend to offer higher salaries. In Guinea, lawyers specializing in corporate law, international trade, and intellectual property often find themselves at the top of the pay scale. For example, a corporate lawyer working with multinational companies can earn upwards of 30,000,000 GNF (approximately $3,000 USD) annually. This is a significant incentive for aspiring lawyers to consider these fields.
Are there additional benefits that lawyers receive?
Beyond their base salaries, many lawyers in Guinea enjoy additional benefits that can enhance their overall compensation package. These may include:
- Performance bonuses: Many firms offer bonuses based on billable hours or successful case outcomes.
- Health insurance: Comprehensive health coverage is often provided, which can be a substantial financial relief.
- Retirement plans: Some firms contribute to retirement savings, ensuring long-term financial security.
- Professional development: Opportunities for further education and training can also be part of the package, helping lawyers stay competitive.
What challenges do lawyers face in Guinea?
While the potential for high earnings exists, it’s essential to acknowledge the challenges lawyers face in Guinea. The legal market can be competitive, and many lawyers struggle to establish themselves, especially in rural areas where legal services are less in demand. Additionally, the economic climate can impact clients’ ability to pay for legal services, which can lead to fluctuations in income for lawyers.
How can aspiring lawyers increase their earning potential?
If you’re considering a career in law or are already on that path, there are several strategies you can employ to boost your earning potential:
- Specialize: Focus on high-demand areas of law that offer better compensation.
- Network: Build relationships with established professionals in the field to gain referrals and mentorship.
- Stay informed: Keep up with legal trends and changes in the law to provide the best service to your clients.
- Gain experience: Seek internships or clerkships to build your resume and gain practical skills.
In conclusion, understanding lawyer salaries in Guinea involves navigating a complex landscape influenced by experience, specialization, and market demand. By staying informed and proactive, you can position yourself for success in this rewarding field. Whether you’re an aspiring lawyer or simply curious about the profession, these insights can help you appreciate the nuances of legal careers in Guinea.