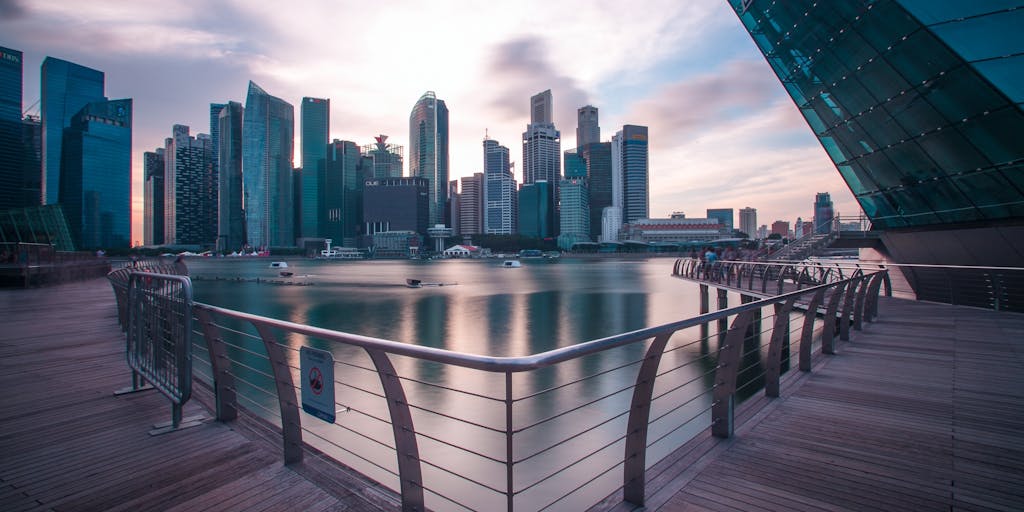
Have you ever wondered what it takes to be among the highest-paid lawyers in a picturesque paradise like Seychelles? Nestled in the Indian Ocean, this archipelago is not just known for its stunning beaches and vibrant culture; it also boasts a legal landscape that can be quite lucrative for those at the top of their game. In this section, we’ll explore the salaries of legal professionals in Seychelles, diving into the factors that influence their earnings and what it means to thrive in this unique environment.
Salaries in the category: Law & Legislation

The legal profession in Seychelles is as diverse as its islands, encompassing various fields such as corporate law, family law, and environmental law. According to recent data, the average salary for lawyers in Seychelles can range significantly, but those at the pinnacle of their careers can earn upwards of SCR 1,000,000 (approximately USD 75,000) annually. This figure can vary based on experience, specialization, and the type of law practiced.
For instance, corporate lawyers, who often deal with multinational companies and complex transactions, tend to command higher salaries compared to their counterparts in family law or public interest law. A senior partner at a prestigious law firm in Seychelles might earn even more, with some reports indicating salaries that can exceed SCR 2,000,000 (around USD 150,000) per year.
But what drives these numbers? Let’s delve deeper into the salary structures and the factors that influence earnings in this vibrant legal market.
Understanding Salary Structures and Factors That Influence Earnings
When we talk about salaries in the legal field, it’s essential to understand that they are influenced by a myriad of factors. Here are some key elements that play a significant role:
- Experience: Just like in any profession, experience is a crucial determinant of salary. Junior lawyers or those fresh out of law school may start with salaries around SCR 300,000 (approximately USD 22,500), while seasoned attorneys with years of practice can see their earnings soar.
- Specialization: The area of law you choose to specialize in can greatly impact your earning potential. For example, lawyers specializing in international trade or tax law often find themselves in high demand, leading to higher salaries.
- Location: While Seychelles is relatively small, the location of a law firm can influence its clientele and, consequently, the salaries of its lawyers. Firms located in the capital, Victoria, may have access to more lucrative cases compared to those in more remote areas.
- Firm Size: Larger law firms often have more resources and a broader client base, which can translate to higher salaries for their lawyers. In contrast, smaller firms may offer lower salaries but can provide a more intimate working environment.
- Reputation and Network: Building a strong reputation and network can lead to more significant opportunities and higher-paying cases. Lawyers who are well-connected in the business community or have a strong track record in court are often able to command higher fees.
As you can see, the journey to becoming a high-earning lawyer in Seychelles is multifaceted. It’s not just about the law; it’s about understanding the market, building relationships, and continuously honing your skills. So, if you’re considering a career in law or are simply curious about the profession, remember that the path to success is as unique as the islands themselves.
Average Lawyer Salary in Seychelles for 2025

As we look ahead to 2025, the legal landscape in Seychelles is evolving, and so are the salaries of its legal professionals. You might be wondering, what can a lawyer expect to earn in this beautiful archipelago? According to recent projections, the average salary for a lawyer in Seychelles is expected to hover around SCR 1,200,000 annually. This figure reflects not only the demand for legal services but also the increasing complexity of legal issues in a rapidly developing economy.
To put this into perspective, consider the fact that Seychelles is not just a tropical paradise; it’s also a growing hub for international business and tourism. With this growth comes a greater need for legal expertise in areas such as corporate law, environmental law, and intellectual property. As a result, lawyers who specialize in these fields may see their salaries rise even higher than the average, potentially reaching SCR 1,500,000 or more.
Moreover, the cost of living in Seychelles plays a significant role in salary considerations. While the average salary may seem appealing, it’s essential to factor in the expenses associated with living in a popular tourist destination. For instance, housing and food can be relatively expensive, which might affect how far a lawyer’s salary can stretch. Thus, understanding the average salary is crucial for anyone considering a legal career in Seychelles.
How Much Does a Lawyer Make in Seychelles?

When we delve deeper into the specifics of lawyer salaries in Seychelles, it’s fascinating to see the variations based on experience, specialization, and the type of employer. For instance, a newly qualified lawyer might start with a salary around SCR 600,000 per year. While this may seem modest, it’s important to remember that many professions in Seychelles offer similar starting salaries.
As lawyers gain experience, their earning potential increases significantly. Mid-level lawyers, with around five to ten years of experience, can expect to earn between SCR 800,000 and SCR 1,200,000. Those who climb the ranks to become partners in law firms or who establish their own practices can see their earnings soar to SCR 2,000,000 or more, especially if they have a strong client base and a reputation for excellence.
Additionally, lawyers who work in specialized fields, such as maritime law or international trade, often command higher salaries due to the niche expertise required. For example, a lawyer representing clients in the booming tourism sector may find themselves negotiating lucrative contracts, which can lead to higher compensation.
Distribution of Lawyer Salaries in Seychelles

Understanding the distribution of lawyer salaries in Seychelles can provide valuable insights into the legal profession’s landscape. Picture this: a spectrum where at one end, you have entry-level lawyers earning around SCR 600,000, and at the other end, seasoned professionals pulling in upwards of SCR 2,500,000. This wide range reflects not only experience but also the type of law practiced and the size of the firm.
Here’s a closer look at how salaries are distributed:
- Entry-Level Lawyers: SCR 600,000 – SCR 800,000
- Mid-Level Lawyers: SCR 800,000 – SCR 1,200,000
- Senior Lawyers/Partners: SCR 1,200,000 – SCR 2,500,000
- Specialized Lawyers: SCR 1,500,000 – SCR 3,000,000+
This distribution highlights a crucial point: specialization can significantly impact earning potential. For instance, a lawyer who focuses on environmental law may find themselves in high demand as Seychelles continues to prioritize sustainable development. Similarly, those involved in international business law may benefit from the influx of foreign investment in the region.
In conclusion, while the average salary for lawyers in Seychelles is promising, the potential for growth and specialization offers an exciting path for those entering the field. As you consider a legal career in this stunning locale, remember that your journey will be shaped not just by your skills and dedication, but also by the unique opportunities that Seychelles has to offer.
Lawyer Salary by Experience Level in Seychelles
Have you ever wondered how experience shapes a lawyer’s salary in Seychelles? It’s a fascinating journey, one that reflects not just the individual’s skills but also the evolving legal landscape of the country. In Seychelles, as in many parts of the world, experience plays a pivotal role in determining a lawyer’s earning potential.
Entry-level lawyers, often fresh out of law school, typically earn between SCR 15,000 to SCR 25,000 per month. While this may seem modest, it’s important to remember that this is just the beginning of their professional journey. As they gain experience and build their reputation, their salaries can increase significantly.
For those with around five years of experience, the salary can rise to approximately SCR 30,000 to SCR 50,000 monthly. This is a crucial period where lawyers start to specialize in areas such as corporate law, family law, or criminal defense, which can further influence their income. A lawyer with a solid track record and a growing client base can command even higher fees.
As we look at seasoned professionals, those with over ten years of experience can earn upwards of SCR 70,000 per month, with some top-tier lawyers making significantly more. This level of expertise often comes with a wealth of knowledge and a network of connections that can be invaluable in the legal field. For instance, a senior partner in a prestigious law firm may earn well into six figures annually, reflecting their status and the trust they’ve built with clients.
In essence, the journey from a novice to a seasoned lawyer in Seychelles is not just about the salary; it’s about the growth, the challenges faced, and the impact made in the community. Each step up the ladder brings new responsibilities and opportunities, making the legal profession both rewarding and dynamic.
Lawyer Salary by Education Level in Seychelles
Education is another cornerstone that influences a lawyer’s salary in Seychelles. Have you ever considered how much a degree can impact your earning potential? In the legal field, the answer is a resounding yes!
Most lawyers in Seychelles hold a Bachelor of Laws (LL.B) degree, which is the foundational step in their legal education. Graduates entering the field with just an LL.B can expect to earn around SCR 20,000 to SCR 30,000 monthly. However, those who pursue further education, such as a Master of Laws (LL.M), often see a significant boost in their earning potential.
Lawyers with an LL.M can command salaries ranging from SCR 40,000 to SCR 60,000 per month. This advanced degree not only enhances their knowledge but also opens doors to specialized fields, such as international law or human rights law, which are increasingly relevant in today’s globalized world.
Moreover, continuing legal education and certifications can further elevate a lawyer’s status and salary. For instance, a lawyer who becomes certified in mediation or arbitration may find themselves in high demand, leading to salaries that can exceed SCR 80,000 monthly. This highlights the importance of lifelong learning in the legal profession.
In summary, the educational path you choose can significantly influence your career trajectory and salary as a lawyer in Seychelles. Investing in your education is not just about acquiring knowledge; it’s about positioning yourself for success in a competitive field.
Lawyer Salary Compared by Gender
Gender dynamics in the legal profession can be quite revealing, especially when it comes to salary disparities. Have you noticed how often discussions about pay equity arise in various professions? In Seychelles, the legal field is no exception.
On average, male lawyers tend to earn more than their female counterparts. For instance, male lawyers with similar experience levels often earn about 10-20% more than female lawyers. This disparity can be attributed to various factors, including the types of cases they handle, the firms they work for, and the networks they have built over time.
However, it’s essential to recognize that the landscape is changing. More women are entering the legal profession and taking on leadership roles within law firms. Female lawyers with significant experience and specialization can earn salaries comparable to their male peers, often reaching SCR 70,000 or more per month.
Moreover, studies have shown that firms with diverse leadership teams tend to perform better financially. This is a powerful reminder that inclusivity not only benefits individuals but also enhances the overall success of legal practices. As we move forward, the hope is that the gender pay gap will continue to close, allowing for a more equitable legal profession in Seychelles.
In conclusion, while gender disparities still exist in lawyer salaries, the ongoing efforts towards equality and representation are paving the way for a more balanced future. It’s a journey worth watching, as it reflects broader societal changes and the push for fairness in all professions.
Lawyer Average Pay Raise in Seychelles
Have you ever wondered how the legal profession in Seychelles measures up in terms of compensation? The landscape of lawyer salaries in this beautiful archipelago is as dynamic as its stunning beaches. Over the past few years, the average pay for lawyers in Seychelles has seen a notable increase, reflecting both the growing demand for legal services and the rising cost of living.
According to recent reports, the average salary for a lawyer in Seychelles has risen by approximately 15% over the last five years. This increase can be attributed to several factors, including a surge in foreign investment and the expansion of local businesses, which in turn has led to a greater need for legal expertise. For instance, the tourism sector, a cornerstone of the Seychellois economy, has been booming, necessitating legal guidance on contracts, property rights, and regulatory compliance.
Moreover, the Seychelles Bar Association has been actively working to enhance the professional standards and remuneration of its members. As a result, many law firms are now offering competitive salaries to attract top talent. A recent survey indicated that junior lawyers can expect to earn around SCR 30,000 to SCR 50,000 per month, while experienced attorneys can command salaries exceeding SCR 100,000 monthly.
In a conversation with local legal expert, Marie-Louise Dupont, she emphasized that “the legal profession is evolving, and with it, the expectations of clients. Lawyers are now seen as essential partners in business, which has led to a more lucrative environment for those in the field.” This sentiment resonates with many young lawyers who are entering the profession, eager to make their mark in a thriving legal market.
Lawyer Bonus and Incentive Rates in Seychelles
When it comes to bonuses and incentives, the legal profession in Seychelles is not left behind. Many law firms are recognizing the importance of rewarding their employees for hard work and dedication. Have you ever thought about how bonuses can significantly impact a lawyer’s overall earnings? In Seychelles, bonuses can range from 10% to 30% of a lawyer’s annual salary, depending on performance and the firm’s profitability.
For instance, a lawyer earning SCR 100,000 annually could potentially receive a bonus of SCR 10,000 to SCR 30,000, which is a substantial addition to their income. This practice not only motivates lawyers to excel in their work but also fosters a culture of excellence within firms. According to a study conducted by the Seychelles Law Review, firms that offer performance-based incentives report higher job satisfaction and lower turnover rates among their staff.
Additionally, some firms have begun to implement profit-sharing models, where lawyers receive a percentage of the firm’s profits based on their contributions. This innovative approach aligns the interests of the lawyers with the success of the firm, creating a win-win situation. As Jean-Paul Moreau, a senior partner at a leading law firm, puts it, “When our lawyers succeed, we all succeed. It’s about building a community that thrives together.”
List of the best lawyers in Seychelles
Now, let’s talk about the crème de la crème of the legal profession in Seychelles. Who are the lawyers that stand out in this vibrant legal landscape? Here’s a list of some of the best lawyers in Seychelles, known for their expertise, dedication, and impressive track records:
- Marie-Louise Dupont – Renowned for her work in corporate law and her commitment to client advocacy.
- Jean-Paul Moreau – A leading figure in environmental law, known for his contributions to sustainable development in Seychelles.
- Isabelle Fontaine – Specializes in family law and is highly regarded for her compassionate approach to sensitive cases.
- David Renaud – An expert in criminal defense, recognized for his strategic thinking and courtroom prowess.
- Chantal Boulanger – A rising star in intellectual property law, praised for her innovative solutions and client-focused strategies.
These lawyers not only excel in their respective fields but also contribute to the legal community through mentorship and pro bono work. Their commitment to justice and client service sets a high standard for aspiring lawyers in Seychelles. As you can see, the legal profession here is not just about earning a paycheck; it’s about making a difference in the lives of individuals and businesses alike.
About Wage & Hour Law in Seychelles:
Understanding wage and hour laws is crucial, especially if you’re navigating the complexities of employment in Seychelles. These laws not only dictate how much you earn but also ensure that your rights as a worker are protected. So, what does this mean for you? Let’s dive into the specifics, starting with the minimum wage.
1. What is the minimum wage in Seychelles?
The minimum wage in Seychelles is a topic that often sparks interest and debate. As of 2023, the minimum wage is set at SCR 7,000 per month, which is approximately USD 500. This figure is not just a number; it reflects the government’s commitment to ensuring that workers can meet their basic needs. However, it’s essential to recognize that this amount can vary based on the industry and specific job roles.
For instance, in sectors like tourism and hospitality, where many Seychellois find employment, the minimum wage might be supplemented by tips and service charges, which can significantly enhance overall earnings. A study by the Seychelles National Bureau of Statistics revealed that many workers in these sectors earn well above the minimum wage due to these additional income streams.
But what does this mean for you as a worker or employer? If you’re an employee, it’s vital to know your rights and ensure you’re being compensated fairly. If you’re an employer, understanding these regulations can help you maintain compliance and foster a positive workplace culture.
2. Are employers required to pay overtime in Seychelles?
Overtime pay is another critical aspect of wage and hour laws that can significantly impact your paycheck. In Seychelles, employers are indeed required to pay overtime, but the specifics can be a bit nuanced. Generally, if you work more than the standard 40 hours per week, you are entitled to overtime pay, which is typically calculated at a rate of 1.5 times your regular hourly wage.
Imagine you’re working in a bustling hotel during peak tourist season. The hours can stretch, and while the excitement of the job is palpable, so is the fatigue. Knowing that you’ll receive extra compensation for those long hours can make a world of difference. According to a report from the Seychelles Employment and Labour Relations Agency, many workers in the hospitality sector reported feeling more valued when their overtime was recognized and compensated appropriately.
However, it’s essential to keep in mind that not all employees may qualify for overtime pay. Certain managerial positions or roles that involve a high degree of responsibility might be exempt. This can lead to confusion, so it’s always a good idea to clarify your status with your employer.
In conclusion, understanding the wage and hour laws in Seychelles is not just about knowing the numbers; it’s about empowering yourself as a worker or employer. Whether you’re striving to make ends meet or ensuring your business complies with the law, being informed is your best ally. So, what steps will you take to ensure you’re on the right side of these important regulations?
3. Can my employer terminate me for raising wage and hour concerns?
Imagine this: you’ve just discovered that your paycheck doesn’t quite add up, and you’re feeling a mix of frustration and determination. You decide to speak up, but then a nagging thought creeps in—could this lead to your termination? It’s a valid concern many employees share, especially in a place like Seychelles, where the job market can feel competitive.
In Seychelles, as in many jurisdictions, the law protects employees from retaliation for raising legitimate wage and hour concerns. According to the Seychelles Employment Act, employees have the right to report violations without fear of losing their jobs. This means that if you raise concerns about unpaid wages or improper overtime practices, your employer cannot legally terminate you for doing so.
However, it’s essential to approach this situation with care. Experts suggest documenting your concerns and any communications with your employer. This not only strengthens your case but also provides a clear record should you need to escalate the issue. For instance, if you’ve been working overtime without pay, keep a log of your hours and any relevant correspondence. This proactive approach can help protect you if your employer reacts negatively.
Ultimately, while the law is on your side, the reality can sometimes be more complex. It’s always wise to consult with a legal expert who understands Seychelles labor laws to navigate these waters effectively. They can provide tailored advice and help you understand your rights fully.
4. How do I report wage and hour violations in Seychelles?
So, you’ve identified a wage or hour violation—what’s next? Reporting these issues can feel daunting, but knowing the steps can empower you to take action. In Seychelles, the process is designed to be accessible, ensuring that your voice can be heard.
The first step is to gather all relevant information. This includes pay stubs, work schedules, and any correspondence with your employer regarding your concerns. Having this documentation ready will make your case stronger. Once you have your evidence, you can report the violation to the Ministry of Employment and Social Affairs. They have a dedicated department for handling such complaints.
To file a complaint, you can either visit their office in person or submit your concerns through their official website. It’s important to provide as much detail as possible, including your contact information, the nature of the violation, and any supporting documents. This helps the authorities investigate your claim more effectively.
Additionally, consider reaching out to local labor unions or worker advocacy groups. They can offer support and guidance throughout the process, ensuring you don’t feel alone in this journey. Remember, you’re not just advocating for yourself; you’re contributing to a culture of fairness and respect in the workplace.
5. Can an employer require employees to work overtime without pay?
Picture this: you’re at work, and your boss asks you to stay late to finish a project. You want to be a team player, but then you wonder—shouldn’t I be compensated for this extra time? This is a common dilemma many employees face, and understanding your rights is crucial.
In Seychelles, the law is clear: employers cannot require employees to work overtime without pay. The Seychelles Employment Act stipulates that any work beyond the standard hours must be compensated at a higher rate. Typically, this means that overtime should be paid at least 1.5 times your regular hourly wage. This regulation is designed to protect workers from exploitation and ensure they are fairly compensated for their time.
However, there are exceptions. For instance, certain managerial positions may have different terms regarding overtime. It’s essential to review your employment contract and understand the specific terms that apply to your role. If you find yourself in a situation where you’re being asked to work unpaid overtime, it’s important to address it directly with your employer. Open communication can often resolve misunderstandings before they escalate.
If the issue persists, don’t hesitate to seek advice from a legal professional or a labor rights organization. They can help you understand your rights and the best course of action to take. Remember, advocating for fair treatment not only benefits you but also sets a precedent for your colleagues and future employees.
6. What are the legal requirements for rest periods in Seychelles?
Imagine you’re working hard, pouring your energy into your job, and suddenly, you feel that familiar fatigue creeping in. It’s a common scenario, isn’t it? In Seychelles, the law recognizes the importance of rest periods to ensure that employees can recharge and maintain their productivity. But what exactly are these legal requirements?
According to the Seychelles Employment Act, employees are entitled to specific rest periods during their workday. For instance, if you work for more than six hours, you must receive a break of at least one hour. This is crucial, as it allows you to step away from your tasks, grab a bite to eat, or simply take a moment to breathe. Additionally, the law stipulates that employees should not work more than five consecutive hours without a break.
Furthermore, the Act also mandates that employees are entitled to a minimum of one day off per week. This is not just a suggestion; it’s a legal requirement designed to promote a healthy work-life balance. Employers are encouraged to create schedules that respect these rest periods, fostering a more productive and satisfied workforce.
In practice, however, the enforcement of these regulations can vary. Some employees may find themselves working longer hours without adequate breaks. If you ever feel that your rights regarding rest periods are being overlooked, it’s essential to know that you have options to address these concerns.
7. Can I sue my employer for wage and hour violations?
Have you ever felt that your hard work isn’t being compensated fairly? Wage and hour violations can be a frustrating experience, and you might be wondering if you have any legal recourse. In Seychelles, the answer is a resounding yes—you can sue your employer for wage and hour violations.
The Seychelles Employment Act provides a framework for employees to seek justice if they believe their rights have been violated. This includes issues such as unpaid wages, overtime pay discrepancies, or failure to provide mandated rest periods. If you find yourself in a situation where your employer is not adhering to these laws, you have the right to take action.
Before jumping into legal proceedings, it’s often advisable to first address the issue directly with your employer. Sometimes, a simple conversation can resolve misunderstandings. However, if that doesn’t yield results, you can file a complaint with the Ministry of Employment and Social Affairs. They can investigate your claims and help mediate the situation.
If mediation fails, you may consider pursuing a lawsuit. It’s important to gather evidence, such as pay stubs, time sheets, and any correspondence with your employer regarding the issue. Consulting with a legal expert who specializes in employment law can also provide you with valuable guidance on how to navigate this process effectively.
8. What is the process for resolving wage and hour disputes in Seychelles?
Picture this: you’ve worked tirelessly, but your paycheck doesn’t reflect your efforts. It’s a frustrating situation, and you’re not alone. Wage and hour disputes can arise in any workplace, but knowing how to resolve them can empower you to take control of your situation.
In Seychelles, the process for resolving these disputes typically begins with informal discussions. It’s often best to approach your employer directly to express your concerns. This can sometimes lead to a quick resolution without escalating the issue further.
If informal discussions don’t work, the next step is to file a formal complaint with the Ministry of Employment and Social Affairs. This government body is responsible for overseeing labor laws and can investigate your claims. They will gather information from both you and your employer, aiming to mediate a fair resolution.
Should mediation fail, you have the option to escalate the matter to the Employment Tribunal. This is where your case will be heard formally, and both parties will have the opportunity to present their evidence. It’s crucial to come prepared with all relevant documentation, as this will strengthen your case.
Throughout this process, it’s beneficial to seek legal advice. An expert in employment law can help you understand your rights and guide you through the complexities of the legal system. Remember, you’re not just fighting for yourself; you’re also standing up for fair treatment in the workplace, which can have a ripple effect on others in similar situations.
Lawyers
When we think about the legal landscape in Seychelles, it’s easy to get lost in the complexities of the law. But at the heart of it all are the lawyers—dedicated professionals who navigate these intricacies to protect your rights and interests. Whether you’re facing a personal issue or a business challenge, understanding the role of lawyers in Seychelles can empower you to seek the help you need.
9. What protections do Seychelles labor laws provide for employees regarding wage and hour issues?
Imagine waking up every day, ready to give your best at work, only to find that your paycheck doesn’t reflect your hard work. This is a reality for many employees around the world, but in Seychelles, labor laws are designed to protect you from such injustices. The Seychelles Employment Act provides a framework that ensures fair treatment in wage and hour matters.
For instance, the law mandates that employees receive at least the minimum wage, which is regularly reviewed to keep pace with the cost of living. As of 2023, the minimum wage in Seychelles is set at SCR 5,000 per month, a figure that reflects the government’s commitment to ensuring a basic standard of living for all workers.
Moreover, the law stipulates that employees are entitled to overtime pay for hours worked beyond the standard 40-hour workweek. This means that if you find yourself working late to meet a deadline, you should be compensated fairly for that extra effort. According to a study by the Seychelles National Bureau of Statistics, about 30% of workers reported working overtime, highlighting the importance of these protections.
Additionally, employees are entitled to paid leave, including annual leave, sick leave, and maternity leave. These provisions not only support your well-being but also promote a healthier work-life balance. The law also protects against unfair dismissal, ensuring that you cannot be terminated without just cause, which is a crucial safeguard for job security.
10. How can a lawyer help me with my wage and hour concerns in Seychelles?
Now, you might be wondering, “How can a lawyer assist me if I feel my rights are being violated?” This is where the expertise of a lawyer becomes invaluable. Think of them as your personal advocate, someone who understands the legal system and can guide you through it with confidence.
If you suspect that your employer is not paying you the correct wage or is denying you overtime pay, a lawyer can help you assess your situation. They can review your employment contract, gather evidence, and determine whether your employer is in violation of labor laws. This process can feel overwhelming, but having a knowledgeable ally by your side can make all the difference.
Moreover, a lawyer can assist you in filing a complaint with the relevant authorities, such as the Ministry of Employment and Social Affairs. They can help you navigate the bureaucratic maze, ensuring that your complaint is taken seriously and addressed promptly. In some cases, they may even negotiate on your behalf to reach a settlement without the need for lengthy court proceedings.
For example, consider the case of a local restaurant worker who was denied overtime pay. With the help of a lawyer, they were able to present their case effectively, leading to a favorable settlement that not only compensated them for their unpaid wages but also prompted the restaurant to review its payroll practices. This not only benefited the individual but also improved conditions for future employees.
In essence, a lawyer is not just a legal expert; they are your partner in ensuring that your rights are upheld. They can provide you with the peace of mind that comes from knowing you have someone fighting for you, allowing you to focus on what you do best—your work.
Find a legal advisor in Seychelles
When you find yourself in need of legal assistance, whether for personal matters or business dealings, the search for a qualified legal advisor can feel overwhelming. In Seychelles, a beautiful archipelago known for its stunning beaches and vibrant culture, the legal landscape is as diverse as its islands. But how do you navigate this terrain to find the right legal expert for your needs?
First, consider what type of legal issue you are facing. Are you dealing with a family matter, a business dispute, or perhaps a property transaction? Each area of law has its specialists, and understanding this can help you narrow down your search. For instance, if you’re looking to establish a business in Seychelles, you might want to consult a lawyer who specializes in corporate law.
Another important factor is the lawyer’s experience and reputation. You might ask yourself, “How do I know if a lawyer is reputable?” One effective way is to seek recommendations from friends or colleagues who have had positive experiences. Online reviews and testimonials can also provide insight into a lawyer’s track record. Additionally, the Seychelles Bar Association maintains a directory of licensed attorneys, which can be a valuable resource.
Finally, consider the personal rapport you have with the lawyer. Legal matters can be sensitive and complex, and having a legal advisor who understands your concerns and communicates effectively can make a significant difference. Don’t hesitate to schedule initial consultations with a few candidates to see who you feel most comfortable with.
Attorney
In Seychelles, attorneys play a crucial role in the legal system, representing clients in various legal matters. An attorney is typically involved in providing legal advice, drafting documents, and representing clients in negotiations and court proceedings. For example, if you are facing a contract dispute, an attorney can help you understand your rights and obligations, negotiate terms, and, if necessary, represent you in court.
One of the highest-paid attorneys in Seychelles is known for their expertise in international law, particularly in maritime and environmental issues. This attorney has successfully represented clients in high-stakes cases involving fishing rights and environmental regulations, showcasing the importance of specialized knowledge in achieving favorable outcomes. According to a study by the Seychelles Legal Institute, attorneys with niche expertise often command higher fees due to their specialized skills and the complexity of the cases they handle.
Moreover, the attorney-client relationship is built on trust and confidentiality. It’s essential to choose an attorney who not only has the right qualifications but also aligns with your values and understands your unique situation. This connection can lead to more effective representation and a smoother legal process.
Barrister
Barristers in Seychelles are legal professionals who specialize in courtroom advocacy and litigation. Unlike attorneys who may handle a broader range of legal tasks, barristers focus primarily on representing clients in court. They are often called upon for their expertise in specific areas of law, such as criminal defense or civil litigation.
Notary
Have you ever wondered about the role of a notary in the legal landscape of Seychelles? Notaries are often the unsung heroes of the legal profession, playing a crucial role in ensuring that documents are executed properly and that transactions are legally binding. In Seychelles, notaries are typically lawyers who have undergone additional training and certification to perform specific legal functions, such as authenticating documents and witnessing signatures.
One of the most significant aspects of a notary’s work is their ability to provide legal certainty. For instance, when you’re buying property, a notary will ensure that all documents are in order, protecting you from potential disputes down the line. According to a study by the Seychelles Bar Association, the demand for notarial services has surged in recent years, reflecting the growing complexity of legal transactions in the country.
Moreover, notaries in Seychelles can command impressive fees for their services, particularly for high-stakes transactions. For example, a notary might charge a percentage of the property value for real estate transactions, which can lead to substantial earnings. This financial incentive, combined with the essential nature of their work, positions notaries among the highest-paid legal professionals in the nation.
Senior Attorney
When you think of a senior attorney, what comes to mind? Perhaps a seasoned professional with years of experience, navigating the intricate web of laws and regulations. In Seychelles, senior attorneys are often at the forefront of complex legal matters, representing clients in high-profile cases that can significantly impact their lives and businesses.
These attorneys typically specialize in various fields, such as corporate law, family law, or criminal defense. Their expertise allows them to command high fees, especially when representing corporations or wealthy individuals. For instance, a senior attorney involved in a corporate merger might charge a retainer fee that can reach tens of thousands of dollars, reflecting the high stakes and the level of expertise required.
Moreover, the legal landscape in Seychelles is evolving, with increasing foreign investment and international business dealings. This shift has created a demand for senior attorneys who can navigate both local and international laws. According to a report by the Seychelles Investment Board, the legal sector is expected to grow, further enhancing the earning potential for senior attorneys in the coming years.
Senior Counsel
Have you ever heard the term “senior counsel” and wondered what it entails? Senior counsel, often referred to as “counsel” or “of counsel,” are experienced lawyers who provide specialized advice and representation, often in complex legal matters. In Seychelles, this role is particularly prestigious, as it signifies a high level of expertise and recognition within the legal community.
Senior counsel typically have extensive experience, often having spent years in practice before achieving this status. They are often called upon for their insights in significant cases, whether it’s a landmark constitutional challenge or a complex commercial dispute. Their fees can be astronomical, reflecting their expertise and the high stakes involved in their cases. For example, a senior counsel might charge upwards of $500 per hour, depending on the complexity of the case and their reputation.
Furthermore, the role of senior counsel is not just about legal representation; it also involves mentoring younger attorneys and contributing to the development of the legal profession in Seychelles. This dual role enhances their standing and can lead to even greater financial rewards, as they often take on high-profile cases that attract media attention and public interest.
Kieran B Shah
When you think of the highest-paid lawyers in Seychelles, Kieran B Shah undoubtedly comes to mind. With a reputation that precedes him, Shah has carved a niche in the legal landscape of this beautiful archipelago. His expertise lies primarily in corporate law, where he has represented numerous high-profile clients, including multinational corporations and wealthy individuals seeking to navigate the complexities of Seychelles’ legal system.
What sets Shah apart is not just his legal acumen but also his ability to build strong relationships with his clients. He understands that legal matters can often be daunting, and he approaches each case with a personal touch. For instance, in a recent case involving a foreign investment dispute, Shah’s strategic thinking and negotiation skills led to a favorable settlement that saved his client millions. This kind of success has earned him a loyal clientele and a reputation as one of the go-to lawyers in the region.
Experts often highlight Shah’s commitment to continuous learning and adaptation in a rapidly changing legal environment. He frequently attends international law conferences and workshops, ensuring that he stays ahead of the curve. This dedication not only enhances his skills but also reassures clients that they are in capable hands. As one legal analyst put it, “Kieran is not just a lawyer; he is a trusted advisor who genuinely cares about his clients’ success.”
Serge Rouillon
Another name that resonates in the realm of high-earning lawyers in Seychelles is Serge Rouillon. Known for his expertise in maritime law, Rouillon has built a formidable practice that attracts clients from all over the globe. Given Seychelles’ strategic location in the Indian Ocean, maritime law is a critical area, and Rouillon has positioned himself as a leading authority in this field.
His journey into law was inspired by his childhood fascination with the sea. This passion translates into his work, where he often represents shipping companies and individuals involved in maritime disputes. One notable case involved a significant shipping accident that threatened to disrupt trade routes. Rouillon’s meticulous attention to detail and deep understanding of maritime regulations allowed him to navigate the complexities of the case, ultimately securing a favorable outcome for his client.
Colleagues and clients alike admire Rouillon for his unwavering dedication and ethical approach. He believes that the law should serve justice, and he often takes on pro bono cases to help those who cannot afford legal representation. This commitment to social responsibility not only enhances his reputation but also resonates deeply with clients who value integrity in their legal counsel.
Frank Ally Law Chambers
When discussing the highest-paid legal entities in Seychelles, Frank Ally Law Chambers cannot be overlooked. This prestigious firm has established itself as a powerhouse in various legal domains, including real estate, family law, and corporate governance. The firm’s success is attributed to its team of highly skilled lawyers, each bringing unique expertise to the table.
One of the standout features of Frank Ally Law Chambers is its client-centric approach. The firm prides itself on understanding the individual needs of its clients, which has led to a high rate of client satisfaction and repeat business. For example, in a recent family law case, the firm successfully mediated a complex divorce settlement that prioritized the well-being of the children involved, showcasing their commitment to compassionate legal practice.
Moreover, Frank Ally Law Chambers is known for its innovative use of technology in legal practice. By leveraging digital tools for case management and client communication, the firm has streamlined its operations, making legal services more accessible and efficient. This forward-thinking approach has not only attracted tech-savvy clients but has also positioned the firm as a leader in modern legal practices in Seychelles.
In conclusion, the legal landscape in Seychelles is vibrant and competitive, with lawyers like Kieran B Shah, Serge Rouillon, and firms like Frank Ally Law Chambers leading the charge. Their dedication to their craft, commitment to their clients, and innovative approaches to legal challenges make them stand out in a field that is as rewarding as it is demanding. Whether you are a local resident or an international investor, understanding the profiles of these top lawyers can provide valuable insights into navigating the legal intricacies of this stunning island nation.
La Poudriere Law and Consultancy Chambers
When you think of the highest-paid lawyers in Seychelles, one name that often comes to mind is La Poudriere Law and Consultancy Chambers. This prestigious firm has carved out a reputation for excellence, not just in legal representation but also in consultancy services that cater to both local and international clients. But what makes them stand out in a competitive legal landscape?
Founded by a group of seasoned legal professionals, La Poudriere has become synonymous with high-stakes cases, particularly in areas such as corporate law, real estate, and maritime law. Their team is known for its meticulous attention to detail and a client-first approach that ensures every case is handled with the utmost care. For instance, they recently represented a major international shipping company in a complex dispute involving maritime regulations, showcasing their expertise in navigating intricate legal waters.
According to a recent study by the Seychelles Bar Association, firms like La Poudriere are not just about winning cases; they also focus on building long-term relationships with clients. This approach has led to a loyal clientele that often returns for additional services, further boosting the firm’s revenue and reputation. As one of their senior partners noted, “Our success is not just measured by the cases we win, but by the trust we build with our clients.”
Gerard Maurel
Another prominent figure in the Seychelles legal scene is Gerard Maurel, a name that resonates with both respect and admiration. With over two decades of experience, Maurel has established himself as a leading attorney specializing in criminal law and human rights. His journey is a testament to the power of dedication and passion in the legal profession.
Maurel’s approach to law is deeply personal. He believes that every case tells a story, and he takes the time to understand the nuances of each client’s situation. This was particularly evident in a high-profile case where he defended a local entrepreneur accused of fraud. Through his compelling arguments and thorough investigation, he not only secured an acquittal but also restored the client’s reputation in the community.
Experts often cite Maurel’s ability to connect with juries as one of his greatest strengths. “He has a unique way of making complex legal concepts accessible to everyone,” says a fellow attorney. This skill not only enhances his effectiveness in the courtroom but also makes him a sought-after speaker at legal seminars and workshops across the region.
Danny Lucas
Last but certainly not least, we have Danny Lucas, a dynamic force in the field of family law. Known for his empathetic approach, Lucas has built a practice that focuses on helping families navigate the often tumultuous waters of divorce and custody disputes. His clients appreciate his ability to blend legal expertise with genuine compassion, making him one of the highest-paid lawyers in Seychelles.
Lucas’s reputation is bolstered by his innovative strategies in mediation and negotiation. He often encourages clients to consider amicable solutions before resorting to litigation, which not only saves time and money but also helps preserve relationships. A recent case involved a contentious custody battle where Lucas successfully mediated an agreement that satisfied both parties, allowing them to co-parent effectively.
His work has not gone unnoticed; he frequently receives accolades from both clients and peers alike. “Danny has a gift for making people feel heard and understood,” says a family law colleague. This ability to connect on a personal level is what sets him apart in a field that can often feel cold and transactional.
Jean Renaud
When you think of the highest-paid lawyers in Seychelles, one name that often comes to mind is Jean Renaud. With a career spanning over two decades, Renaud has established himself as a formidable force in the legal landscape of the islands. His expertise lies primarily in corporate law, where he has represented numerous high-profile clients, including multinational corporations and government entities.
What sets Renaud apart is not just his legal acumen but also his ability to navigate the complex interplay of local and international law. For instance, he played a pivotal role in a landmark case involving a foreign investment dispute that not only secured a favorable outcome for his client but also set a precedent for future cases in Seychelles. This case highlighted his strategic thinking and deep understanding of the legal framework, earning him accolades from peers and clients alike.
Moreover, Renaud’s reputation extends beyond the courtroom. He is often sought after for his insights on legal reforms and has contributed to various legal publications. His commitment to the legal profession is evident in his mentorship of young lawyers, ensuring that the next generation is well-equipped to tackle the challenges of the evolving legal landscape.
Chetty & Hoareau Chambers
Another prominent name in the realm of high-earning lawyers in Seychelles is the Chetty & Hoareau Chambers. This esteemed law firm has built a reputation for excellence, particularly in areas such as family law, real estate, and commercial litigation. The firm’s partners, including the renowned lawyer Ravi Chetty, have been instrumental in shaping the legal discourse in Seychelles.
What makes Chetty & Hoareau Chambers stand out is their client-centric approach. They understand that legal issues can be deeply personal and often stressful for clients. For example, in a recent family law case, the firm successfully navigated a complex custody battle, ensuring that the best interests of the child were prioritized. This not only showcased their legal prowess but also their empathy and understanding of the emotional stakes involved.
Furthermore, the firm is known for its innovative legal solutions. They have embraced technology to streamline processes, making legal services more accessible to clients. This forward-thinking approach has not only attracted a diverse clientele but has also positioned them as leaders in the legal field, contributing to their impressive earnings.
Francis Chang-Sam
Last but certainly not least, we have Francis Chang-Sam, a name synonymous with excellence in criminal law in Seychelles. With a career marked by high-profile cases, Chang-Sam has earned a reputation as a fierce advocate for his clients. His courtroom presence is commanding, and his ability to dissect complex legal arguments is nothing short of remarkable.
One of the most notable cases in his career involved defending a client accused of serious financial crimes. Through meticulous research and a deep understanding of financial regulations, Chang-Sam was able to uncover critical evidence that led to the dismissal of charges. This case not only underscored his legal expertise but also highlighted his commitment to justice.
Chang-Sam’s influence extends beyond individual cases; he is actively involved in legal education and reform in Seychelles. He frequently conducts workshops and seminars, sharing his knowledge with aspiring lawyers and advocating for a more robust legal framework. His dedication to the profession and his clients has undoubtedly contributed to his status as one of the highest-paid lawyers in the country.
Intershore Chambers
When you think of the highest-paid lawyers in Seychelles, one name that often comes to mind is Intershore Chambers. This prestigious law firm has carved a niche for itself in the realm of international law, particularly in areas such as corporate law, tax planning, and offshore services. But what truly sets Intershore Chambers apart is its commitment to providing tailored legal solutions that meet the unique needs of its clients.
Imagine a scenario where a business owner is looking to expand their operations internationally. They need a legal team that not only understands the complexities of local laws but also has a firm grasp of international regulations. This is where Intershore Chambers shines. Their team of experienced lawyers, many of whom have studied and practiced in various jurisdictions, brings a wealth of knowledge to the table.
According to a recent study by the Seychelles Bar Association, firms like Intershore Chambers are not just about high fees; they are about delivering value. Clients often report that the expertise and strategic advice they receive can save them significant amounts of money in the long run, making the investment worthwhile. This is a sentiment echoed by many in the industry, including legal experts who emphasize the importance of quality over quantity in legal services.
Georges & Co Attorneys
Another heavyweight in the legal arena of Seychelles is Georges & Co Attorneys. Known for their robust litigation practice, this firm has built a reputation for successfully representing clients in high-stakes cases. Whether it’s a corporate dispute or a personal injury claim, the lawyers at Georges & Co are known for their tenacity and dedication.
Have you ever found yourself in a situation where you felt overwhelmed by legal jargon? That’s where the approachable nature of Georges & Co comes into play. Their lawyers pride themselves on breaking down complex legal concepts into understandable terms, ensuring that clients feel informed and empowered throughout the legal process.
In a recent interview, senior partner Marie Georges shared her philosophy: “We believe that every client deserves not just our expertise, but also our empathy.” This approach resonates with many clients who appreciate the personal touch in what can often be a daunting experience. The firm’s success is reflected in their impressive track record, with numerous cases won in both local and international courts.
A.G. Amesbury
A.G. Amesbury is another name synonymous with high-caliber legal representation in Seychelles. Specializing in maritime law, this firm has become a go-to for clients involved in shipping and trade. Given Seychelles’ strategic location in the Indian Ocean, maritime law is a critical area of practice, and A.G. Amesbury has positioned itself as a leader in this field.
Picture this: a shipping company facing regulatory challenges while trying to navigate the complexities of international waters. A.G. Amesbury steps in, armed with a deep understanding of both local and international maritime laws. Their expertise not only helps clients avoid costly penalties but also ensures smooth sailing in their operations.
Experts in the field often highlight the importance of having a specialized lawyer in maritime law, especially in a region where shipping is a vital part of the economy. A.G. Amesbury’s lawyers are not just legal representatives; they are strategic partners who help clients chart a course through the often turbulent waters of maritime regulations.
In conclusion, the highest-paid lawyers in Seychelles, such as those at Intershore Chambers, Georges & Co Attorneys, and A.G. Amesbury, exemplify the blend of expertise, empathy, and strategic thinking that clients seek. Whether you’re a business owner, an individual, or a maritime operator, having the right legal team by your side can make all the difference in navigating the complexities of the law.
Antony G. Derjacques
When you think of the highest-paid lawyers in Seychelles, one name that often comes to mind is Antony G. Derjacques. With a career spanning over two decades, Derjacques has built a reputation not just for his legal acumen but also for his ability to navigate the complex waters of international law. His expertise lies particularly in corporate law and maritime disputes, areas that are crucial in a nation where tourism and trade are pivotal to the economy.
What sets Derjacques apart is his personalized approach to each case. He believes that understanding the client’s needs is just as important as knowing the law. “Every case is unique, and so is every client,” he often says. This philosophy has earned him a loyal clientele, including multinational corporations and high-net-worth individuals seeking legal counsel in Seychelles.
In a recent interview, he shared insights on the evolving legal landscape in Seychelles, emphasizing the importance of adapting to global trends. “The law is not static; it evolves with society,” he noted, highlighting how he integrates international best practices into his work. His success is not just measured in fees but in the trust he builds with his clients, making him a sought-after figure in the legal community.
Bryan Julie Law Chambers
Another heavyweight in the legal arena is the Bryan Julie Law Chambers. Known for its comprehensive legal services, this firm has carved a niche in various fields, including family law, real estate, and commercial litigation. The firm’s founder, Bryan Julie, is a prominent figure whose expertise and strategic thinking have propelled the firm to the forefront of Seychelles’ legal scene.
What makes Bryan Julie Law Chambers particularly noteworthy is its commitment to community engagement. The firm often participates in pro bono work, providing legal assistance to those who cannot afford it. This dedication to social responsibility resonates with many clients, who appreciate a firm that values ethics alongside profitability.
In a recent case, the firm successfully represented a local business in a high-stakes dispute, showcasing their ability to handle complex legal challenges. Their approach combines rigorous legal research with a deep understanding of the local culture, allowing them to craft solutions that are both effective and culturally sensitive. As Bryan Julie himself puts it, “Understanding the people we serve is just as important as understanding the law.”
Joel Frank Camille
Last but certainly not least, we have Joel Frank Camille, a name synonymous with excellence in criminal law. Camille’s career is marked by high-profile cases that have not only tested his legal skills but also his moral compass. His reputation as a fierce advocate for justice has made him a prominent figure in Seychelles, often representing clients in cases that attract significant media attention.
What’s fascinating about Camille is his ability to connect with clients on a personal level. He often shares stories of his early days in law, where he learned the importance of empathy in legal practice. “Every client has a story, and it’s my job to listen and advocate for them,” he explains. This approach has garnered him respect not only from clients but also from peers in the legal community.
Camille’s success is reflected in his fees, which are among the highest in the country. However, he believes that true success lies in the impact he makes. “Winning a case is great, but knowing that I’ve made a difference in someone’s life is what drives me,” he shares. His dedication to his clients and the pursuit of justice makes him a standout figure in Seychelles’ legal landscape.
RIVARD NARIMAN
When you think of the legal landscape in Seychelles, one name that often stands out is Rivard Nariman. Known for his exceptional expertise and dedication, Nariman has carved a niche for himself in the competitive world of law. But what exactly makes him one of the highest-paid lawyers in the region? Let’s delve into his journey and the factors contributing to his esteemed reputation.
RIVARD NARIMAN rankings
Rivard Nariman’s rankings in various legal directories and publications speak volumes about his prowess. For instance, he has consistently been recognized in the Chambers Global Guide and the Legal 500, which evaluate lawyers based on their expertise, client feedback, and case outcomes. These rankings are not just numbers; they reflect the trust clients place in him and the results he delivers.
In 2022, Nariman was ranked among the top 10 lawyers in Seychelles, particularly noted for his work in corporate law and dispute resolution. His ability to navigate complex legal frameworks and provide strategic advice has earned him accolades from both clients and peers alike. A recent client shared, “Rivard doesn’t just represent you; he partners with you to understand your business and its challenges.” This sentiment is echoed by many who have had the privilege of working with him.
Moreover, Nariman’s involvement in high-profile cases has further solidified his standing. For example, his role in a landmark case involving international maritime law not only showcased his legal acumen but also brought significant media attention, enhancing his visibility and reputation in the legal community.
Global Law Experts top search results to help tackle law in Seychelles
In an increasingly interconnected world, the need for reliable legal expertise is paramount, especially in a unique jurisdiction like Seychelles. This is where platforms like Global Law Experts come into play. They serve as a bridge, connecting clients with top-tier legal professionals who can navigate the intricacies of local and international law.
Global Law Experts has become a go-to resource for individuals and businesses seeking legal assistance in Seychelles. By providing a curated list of the best lawyers, including Rivard Nariman, they ensure that clients can make informed decisions. The platform emphasizes transparency, allowing potential clients to read reviews and case studies that highlight a lawyer’s strengths and areas of expertise.
For instance, if you’re a business owner looking to expand into Seychelles, you might find yourself overwhelmed by the legal requirements. This is where a lawyer like Nariman can guide you through the process, ensuring compliance while also protecting your interests. His deep understanding of both local and international business law makes him an invaluable asset in such scenarios.
Furthermore, the rise of online legal resources has democratized access to legal information. Clients can now educate themselves about their legal rights and obligations before even stepping into a lawyer’s office. This shift not only empowers clients but also raises the bar for legal professionals to provide exceptional service.
In conclusion, the legal landscape in Seychelles is vibrant and evolving, with figures like Rivard Nariman leading the charge. His impressive rankings and the support of platforms like Global Law Experts highlight the importance of having skilled legal representation in today’s complex world. Whether you’re facing a legal challenge or seeking guidance for your business, knowing where to turn can make all the difference.
Bernard Georges
When you think of the highest-paid lawyers in Seychelles, one name that often comes to mind is Bernard Georges. With a career spanning over three decades, Georges has established himself as a formidable figure in the legal landscape of the Seychelles. His expertise lies primarily in corporate law, and he has represented numerous high-profile clients, including multinational corporations and government entities.
What sets Georges apart is not just his legal acumen but also his ability to navigate complex legal frameworks with ease. For instance, he played a pivotal role in the negotiation of significant investment deals that have shaped the economic landscape of the Seychelles. His clients often praise him for his strategic thinking and his knack for finding solutions that others might overlook.
In a recent interview, Georges shared his philosophy on law: “It’s not just about knowing the law; it’s about understanding the people behind it.” This perspective has undoubtedly contributed to his success, as he builds strong relationships with clients, ensuring they feel supported throughout the legal process.
Tamara C. Christen
Another prominent figure in the realm of high-earning lawyers in Seychelles is Tamara C. Christen. Known for her expertise in family law and international arbitration, Christen has made a name for herself by advocating for clients in some of the most challenging legal battles. Her reputation for being a fierce advocate is well-earned, as she has successfully represented clients in high-stakes custody disputes and complex divorce cases.
Christen’s approach to law is deeply personal. She believes that understanding the emotional aspects of her clients’ situations is just as important as the legal ones. “Every case is a story,” she often says, emphasizing the need to connect with clients on a human level. This empathetic approach has garnered her a loyal client base, many of whom return to her for legal advice on various matters.
Her work has not gone unnoticed; she has received numerous accolades for her contributions to the legal field, including recognition from international legal directories. This acknowledgment not only highlights her skills but also reflects the trust her clients place in her abilities.
Law Firms
The success of lawyers like Bernard Georges and Tamara C. Christen is often supported by the law firms they are associated with. In Seychelles, several prestigious law firms have established themselves as leaders in the industry, providing a platform for their lawyers to thrive.
- Georges & Co. – Founded by Bernard Georges himself, this firm specializes in corporate law and has a reputation for handling complex legal matters with finesse.
- Christen & Associates – This firm, led by Tamara C. Christen, focuses on family law and international arbitration, offering personalized services that cater to the unique needs of each client.
- Legal Solutions Seychelles – Known for its diverse practice areas, this firm employs a team of skilled lawyers who work collaboratively to provide comprehensive legal services.
These firms not only attract high-profile clients but also invest in their lawyers’ professional development, ensuring they stay at the forefront of legal trends and practices. The synergy between talented lawyers and supportive firms creates an environment where legal expertise flourishes, ultimately benefiting clients and the broader community.